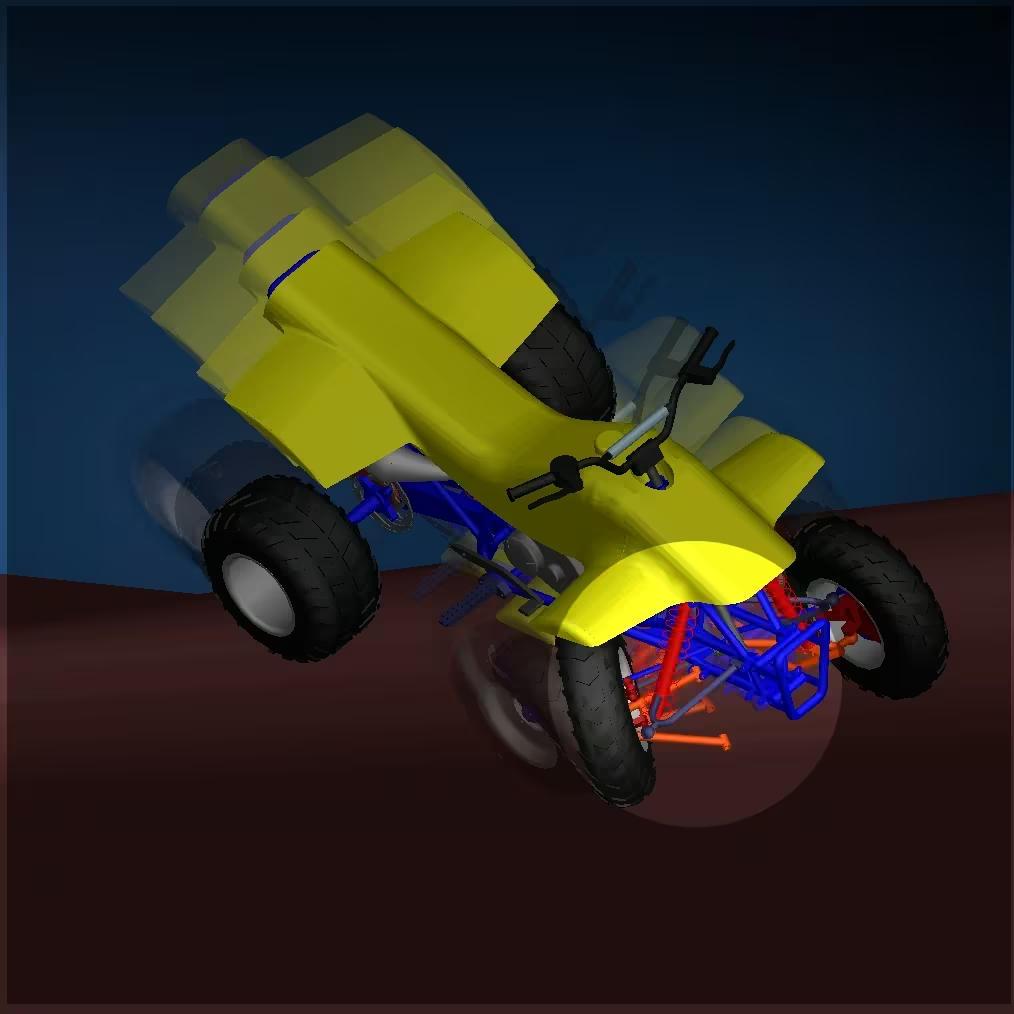
Welcome to this getting started guide for Adams, the world’s leading software for multibody dynamics simulation. Adams enables you to create and test virtual prototypes of complex mechanical systems, accurately simulating their full motion behaviour on your computer—both visually and mathematically.
Adams features a robust solution engine that automatically formulates and solves the equations of motion for kinematic, static, quasi-static, and dynamic analyses. As your simulation runs, you can immediately view animations and plots, allowing you to refine your design in real time and significantly reduce development time.
Adams also supports advanced design optimization. You can define variables, set constraints and specify performance goals, then let the software automatically iterate to deliver an optimized system design.
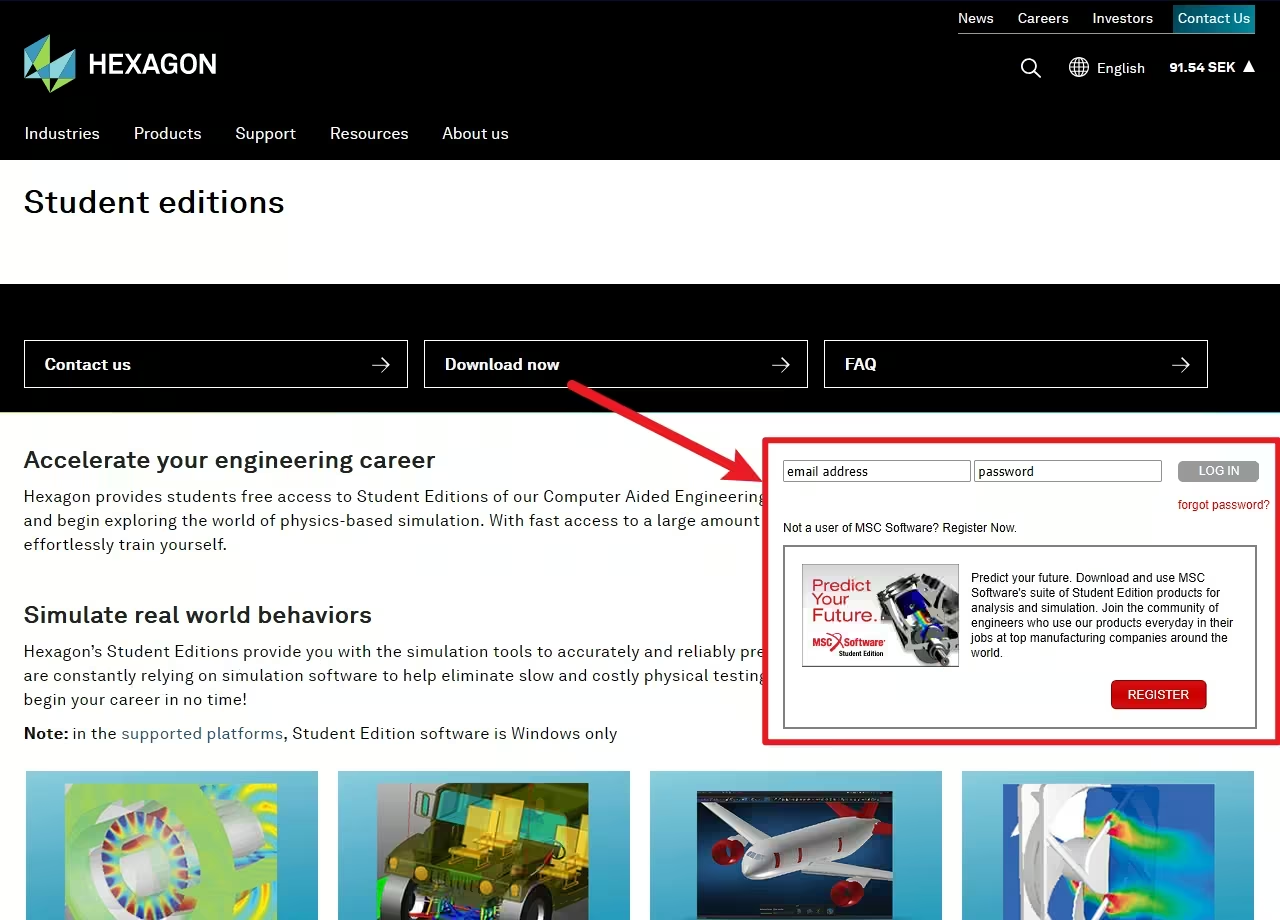
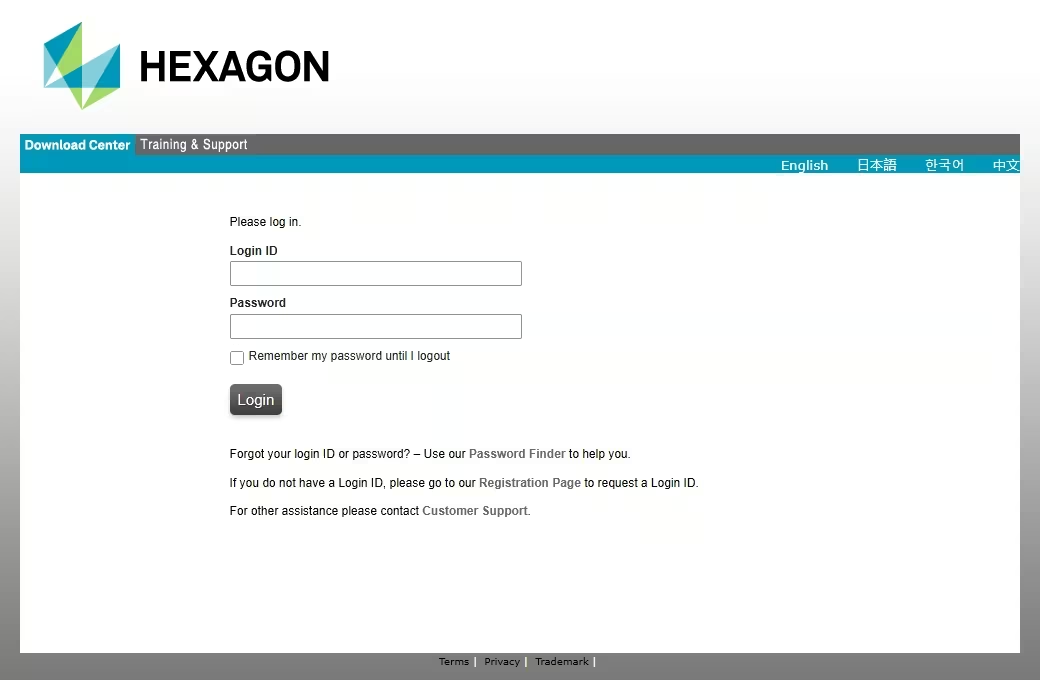
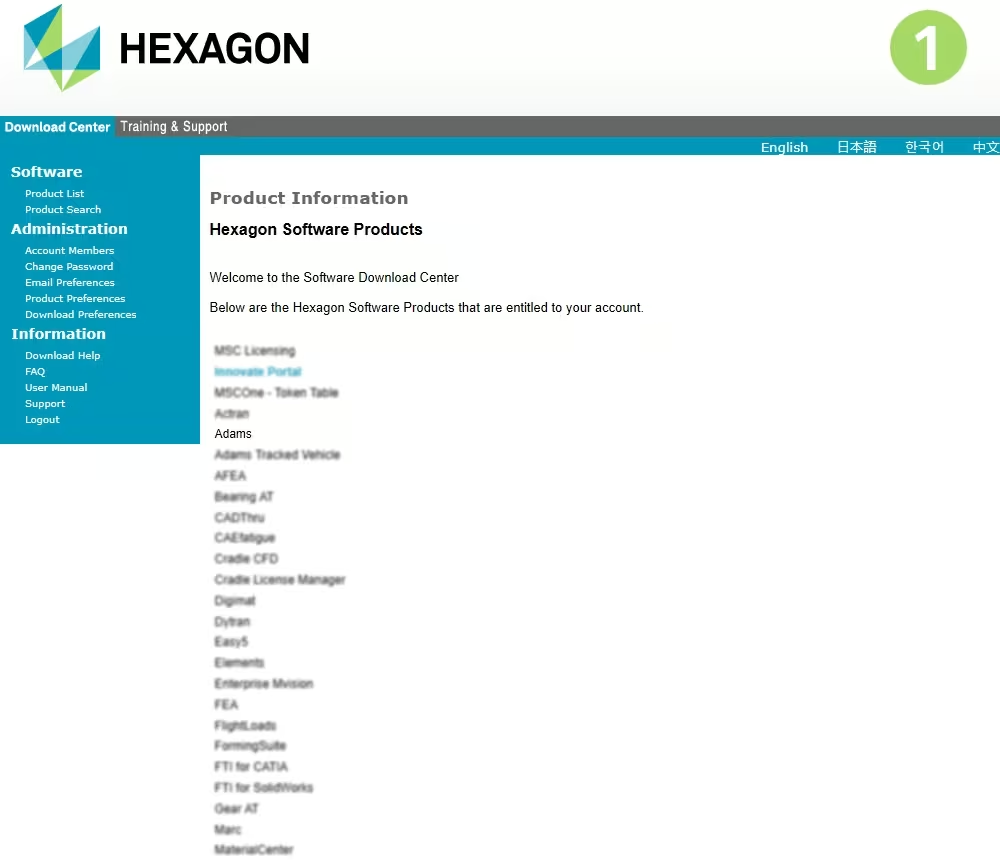
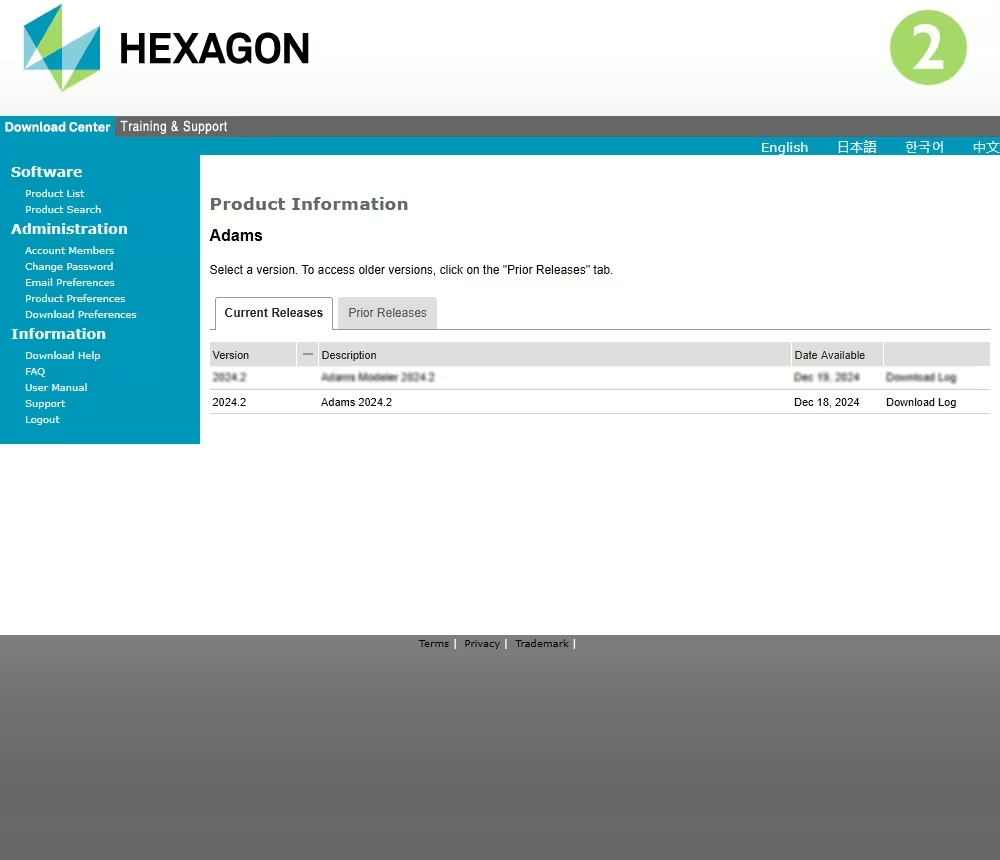
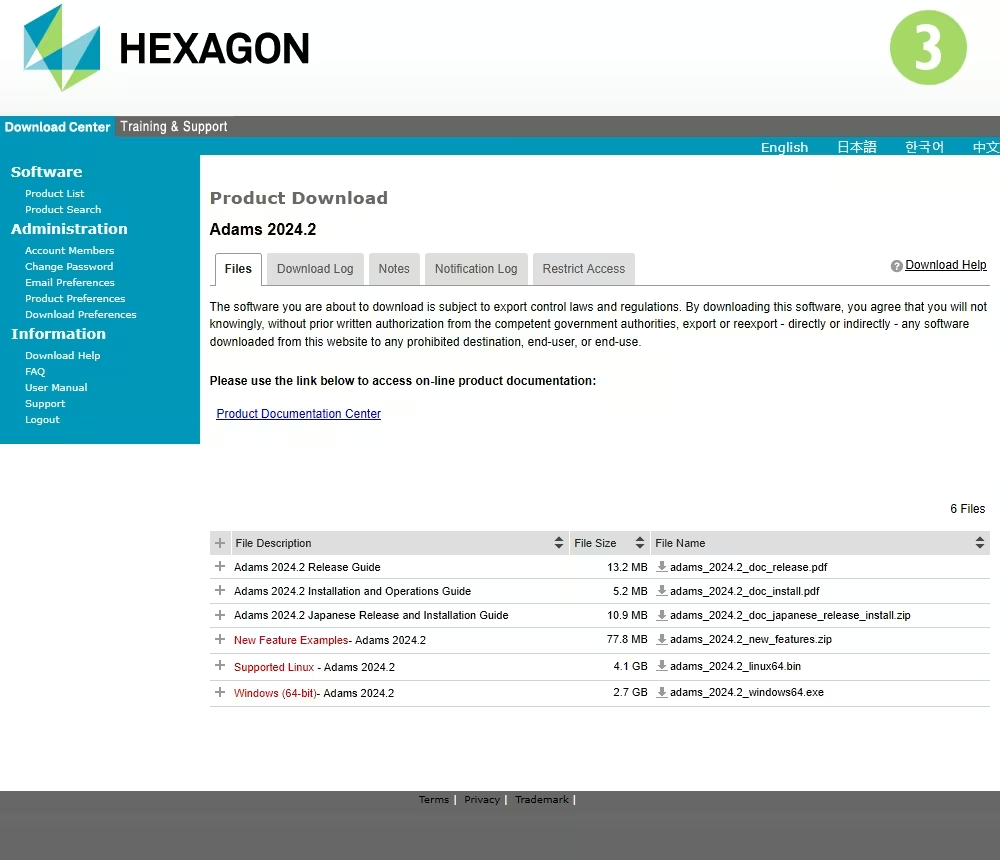
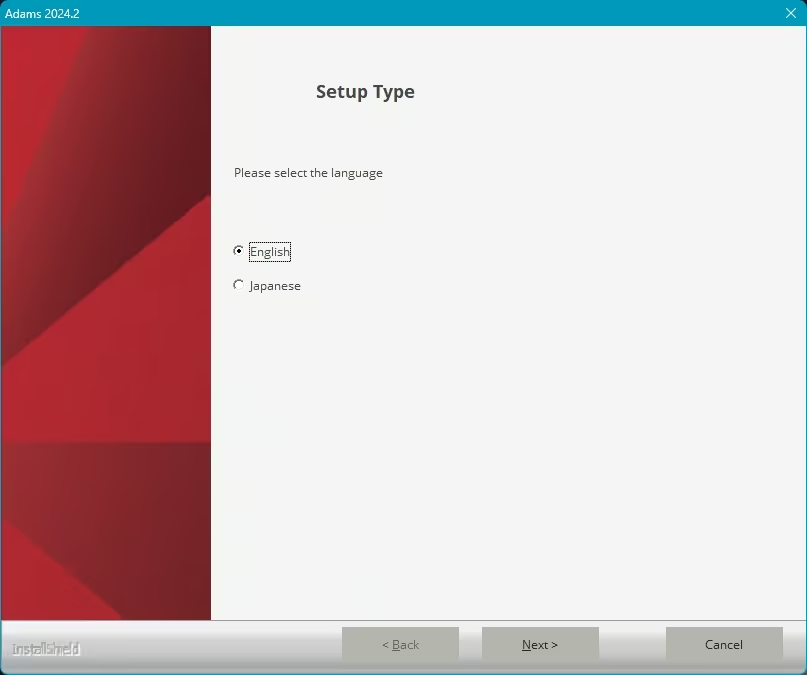
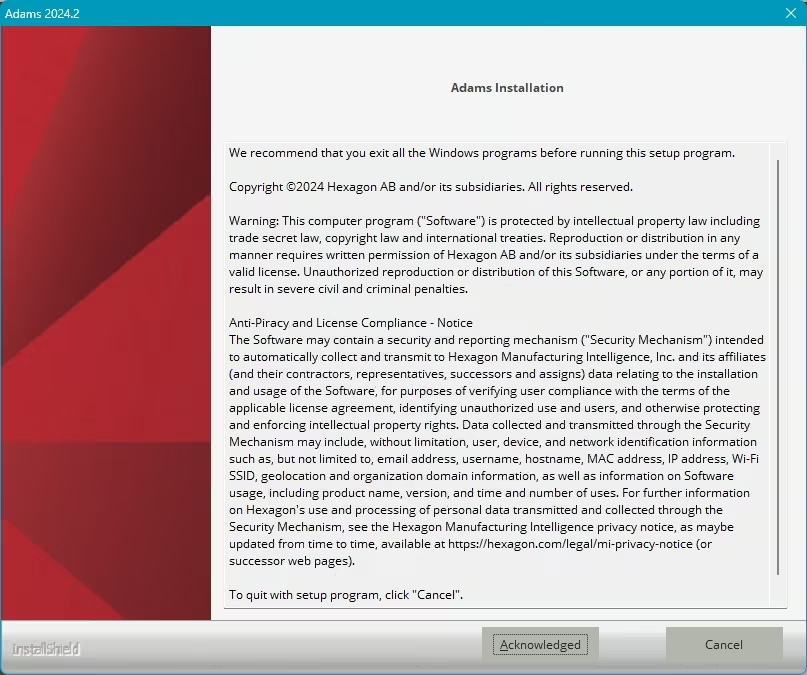
In this guide we will show you how to access the Adams installation files, as well as a step-by-step walkthrough for the installation process.
To obtain a student version of Adams, go to Hexagon's website, select Download now and Register as a student by uploading an image of your valid student card and download the student version.
If you are an MSC One user you can download Adams as well as other MSC One products from the Hexagon Download Center.
Once you’ve logged in to the Download Center (your company’s Hexagon account manager can give you access to the Download Center), you can select Adams from the Product List (1), this opens the next page where you can pick the version you want to download (2).
On the Product Download page (3), you can click on any of the File Names to download that file. For Adams we recommend that you download at least the Windows (64bit) installation file, but we recommend that you download the New Feature Examples as well.
The New Feature Examples has pre-built models that highlight the latest features added to Adams, as mentioned in the Release Guide.
Select your preferred language and click Next.
Click on Acknowledged to continue.
Enter your User Name and Company Name.
Choose whether you want to have Adams available for Anyone who uses the computer, or just for the currently logged in Windows user. We recommend the “all users” option, but this could be overruled by your IT policies.
Here you choose whether you want a Full installation, or if you would prefer to choose the Adams components to install.
For simplicity and for novice users we recommend the Full installation, where all the Adams components will be installed. Advanced users who know exactly which Adams modules they are going to use can pick the User Selectable option.
For this guide we are going to continue with the Full installation option.
The Destination Folder box gives you the option to change the installation folder location. It is recommended to keep the default directory, but not a requirement.
In this step you can confirm the following before continuing the installation:
Confirm that all this is correct and click the Next button to start the installation.
You can leave the License entry blank if your license has already been set up with an Environment Variable. If that was not done refer to the following guide: How to Setup a License Server Using the MSC Licencing Tool.
Click Next to continue.
Choose whether you want desktop icons added for all the installed Adams modules. Click Next to continue.
It is recommended to leave this as the default (Adams Solver). Click Next to continue
Congratulations your installation is complete. Click Finish.